User Defined Fields Upgrade
The upgrade to User Defined Fields occurred earlier in the 2019 year however there are still many schools that are not aware of the improved features available in User Defined Fields so we have included a profile of these upgraded features in this update.
User Defined Fields are an opportunity for schools to capture and display important and relevant information about students to make the information easily accessible and, where required, influential in how your workflows operate.
There have been two significant updates to how User Defined Fields can be used in REACH:
- Schools can not have an unlimited number of User Defined Fields, and
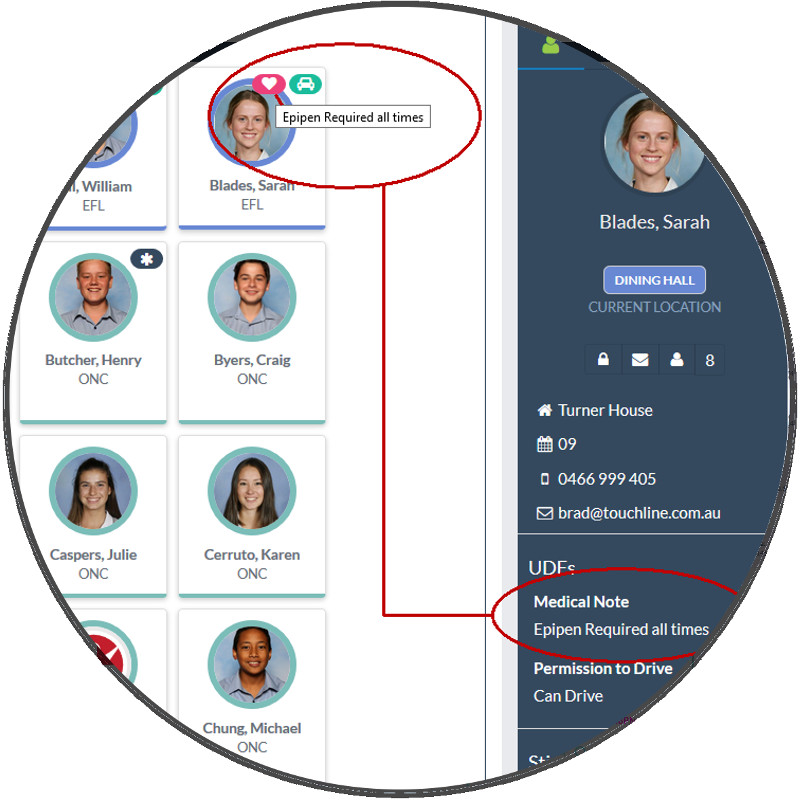
- You can reflect the data from your User Defined Field onto a student's profile on the Kiosk View as an icon.
....
Icons display only when a student has content
When icons are selected for display in the Student Kiosk screen, an icon will only display for students that have content added for the UDF field. That is, only students with an identified Medical Issue in the example above will display any icon.
LoadingHow to create and use User Defined Fields
Using User Defined Fields is a two step process.
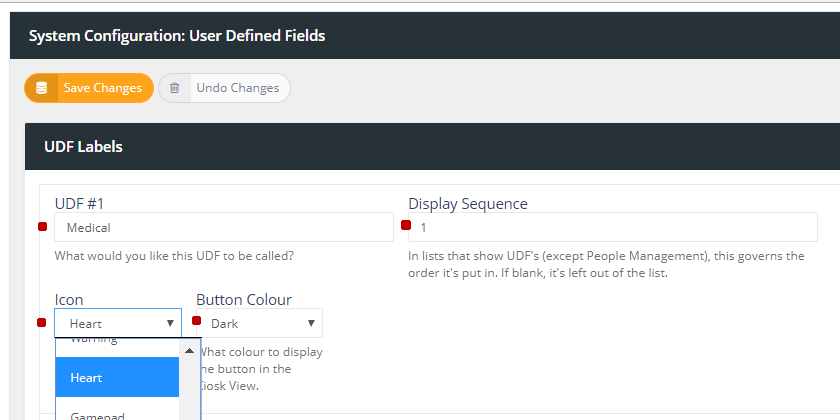
Step 1: Create your User Defined Fields
Got to System Config > User Defined Fields
In your System Configuration section set the Title for each of your User Defined Fields.
In this process you set the following information;
* The Name of the User Defined Fields (ie: the display title in the sidebar view)
* The Display sequence of the User Defined Field in the sidebar display
* If you want to also display an icon on the Kiosk view reflecting the User Defined Field information
(If you do want to display an icon then you need to select the icon to use and colour of the icon in the display. If you do not select an icon then there will be no display in the kiosk view).
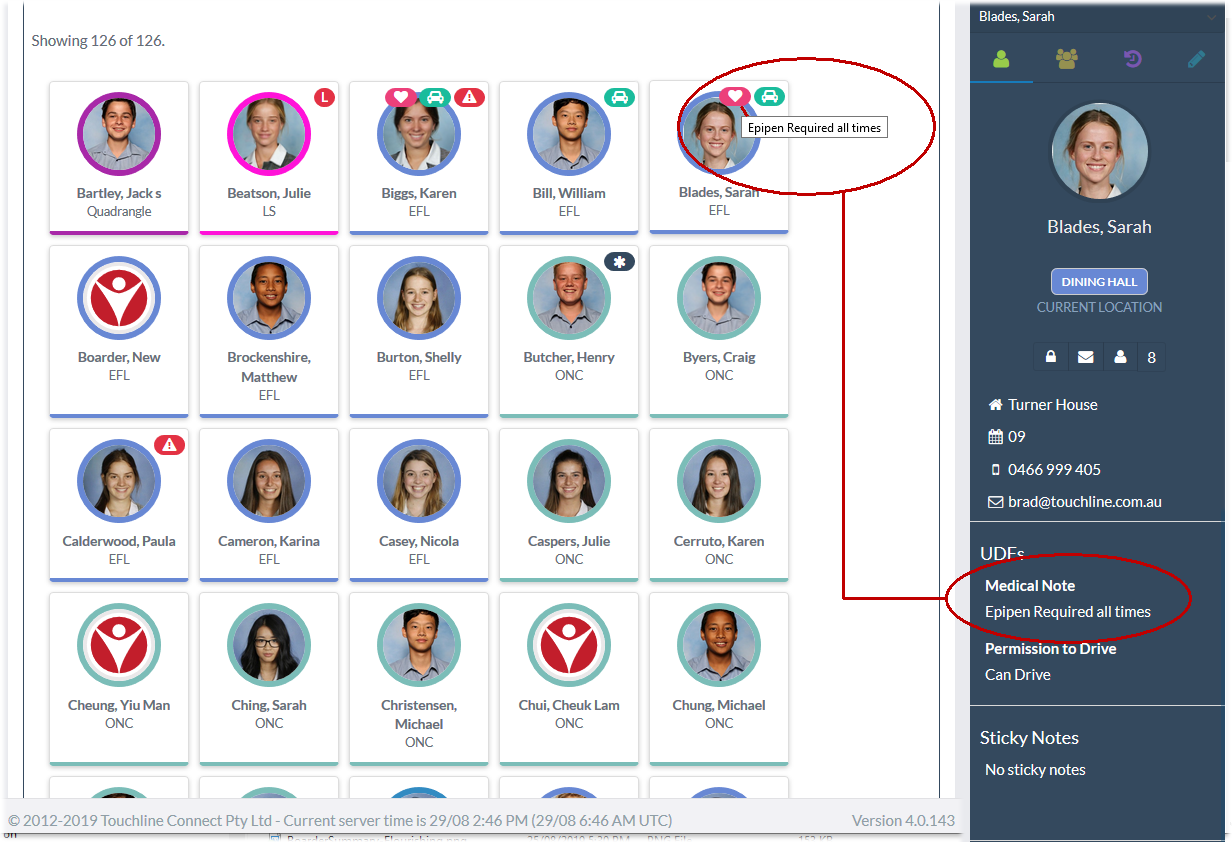
Less is more for icons in your Kiosk display
Be aware that displaying too many icons in your Kiosk view will actually make the icons "less" useful rather than more useful. Your Kiosk display can rapidly fill with icons if you choose to display too many and the end result may be icon blindness for your users where the icons fail to create the visual alert that you are intending them to have.
....
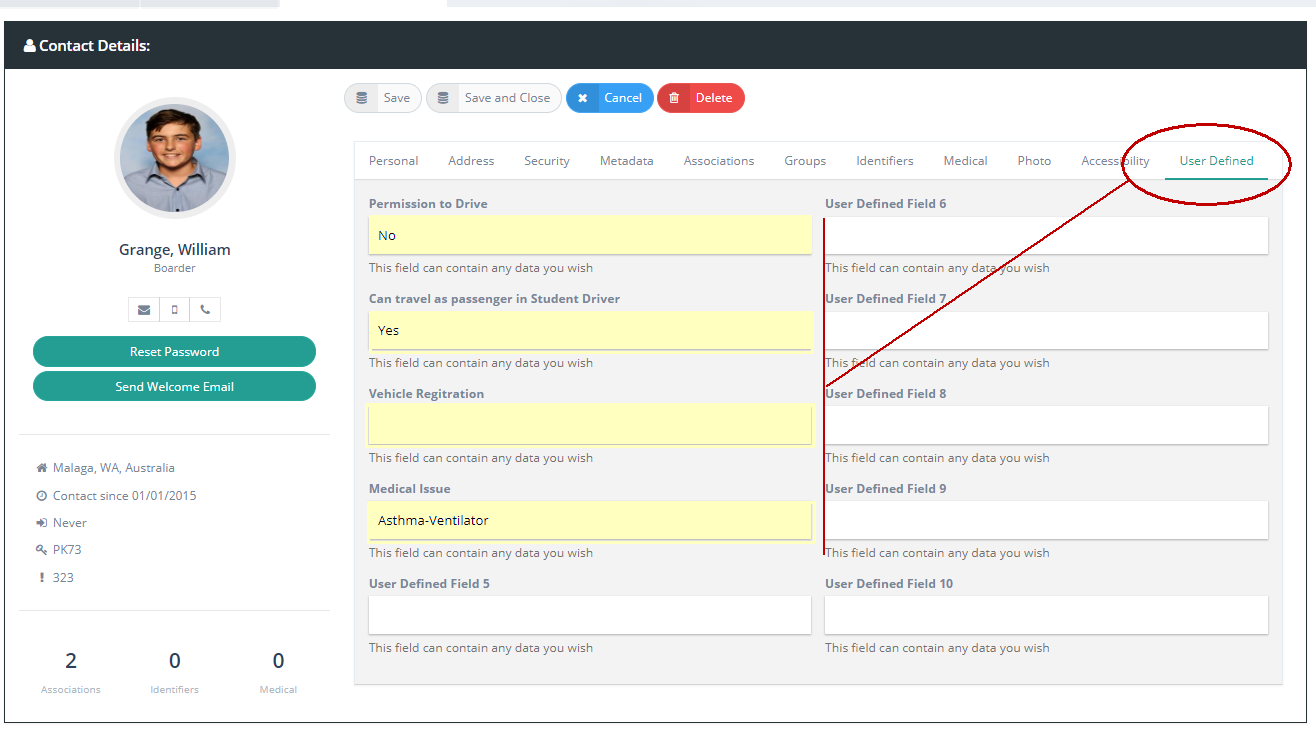
Step 2: Enter individual student data for each User Defined Field
Go to People Management >> Student Profile >> User Defined Tab
Having created the User Defined Field, the next step is to populate the field with data for students that have information relating to the field.
In the Personal Profile for each of your students you can enter their relevant status for each User Defined Field being use